
Any model plot that you create interactively by adding plot-items, adjusting plot settings or the plot view, defining ranges, or adding cut-planes can be represented by an equivalent set of commands. Including command-driven plotting in your modeling run(s) is useful to:
- automate plot creation and export;
- parameterize plots (settings, views, plot-items shown); and
- learn plot-related commands.
Itasca consultants may require dozens or even hundreds of plots in order to analyze the behavior of the physical systems they are simulating and to report the results to clients. Often, many of the same types of plots are also of interest. It can therefore be useful to have programmable plots that can be generated by repeatable commands rather than recreating them interactively on the fly over and over. Such commands include everything from adding new plots or deleting plots, to what is shown in the plot, and how it's shown. And of course, since you're working with a data file, you can include FISH functions or inline FISH to automate and parameterize the commands. Finally, by reviewing the exported plot data file, you will be able to learn the plot commands.
Exporting your plot to a data file couldn't be easier:
- Construct a plot with plot items and view adjustments as needed.
- Export the plot to a data file as shown in the following image (by right-clicking the plot and choosing Export > Data File... )

At this point, a new data file will open in your project. You will see (image below) that the plot data file follows a uniform structure.
- Commands that affect the plot as a whole are written (
plot create,plot clear, etc.). - Next, the
plot viewcommand (or possibly commands) controlling the view appears. - Last, the
plot itemcommands that “populate” the plot are shown.
You can now review the exported data file and incorporate it in part or in its entirety into the command sequence under construction.
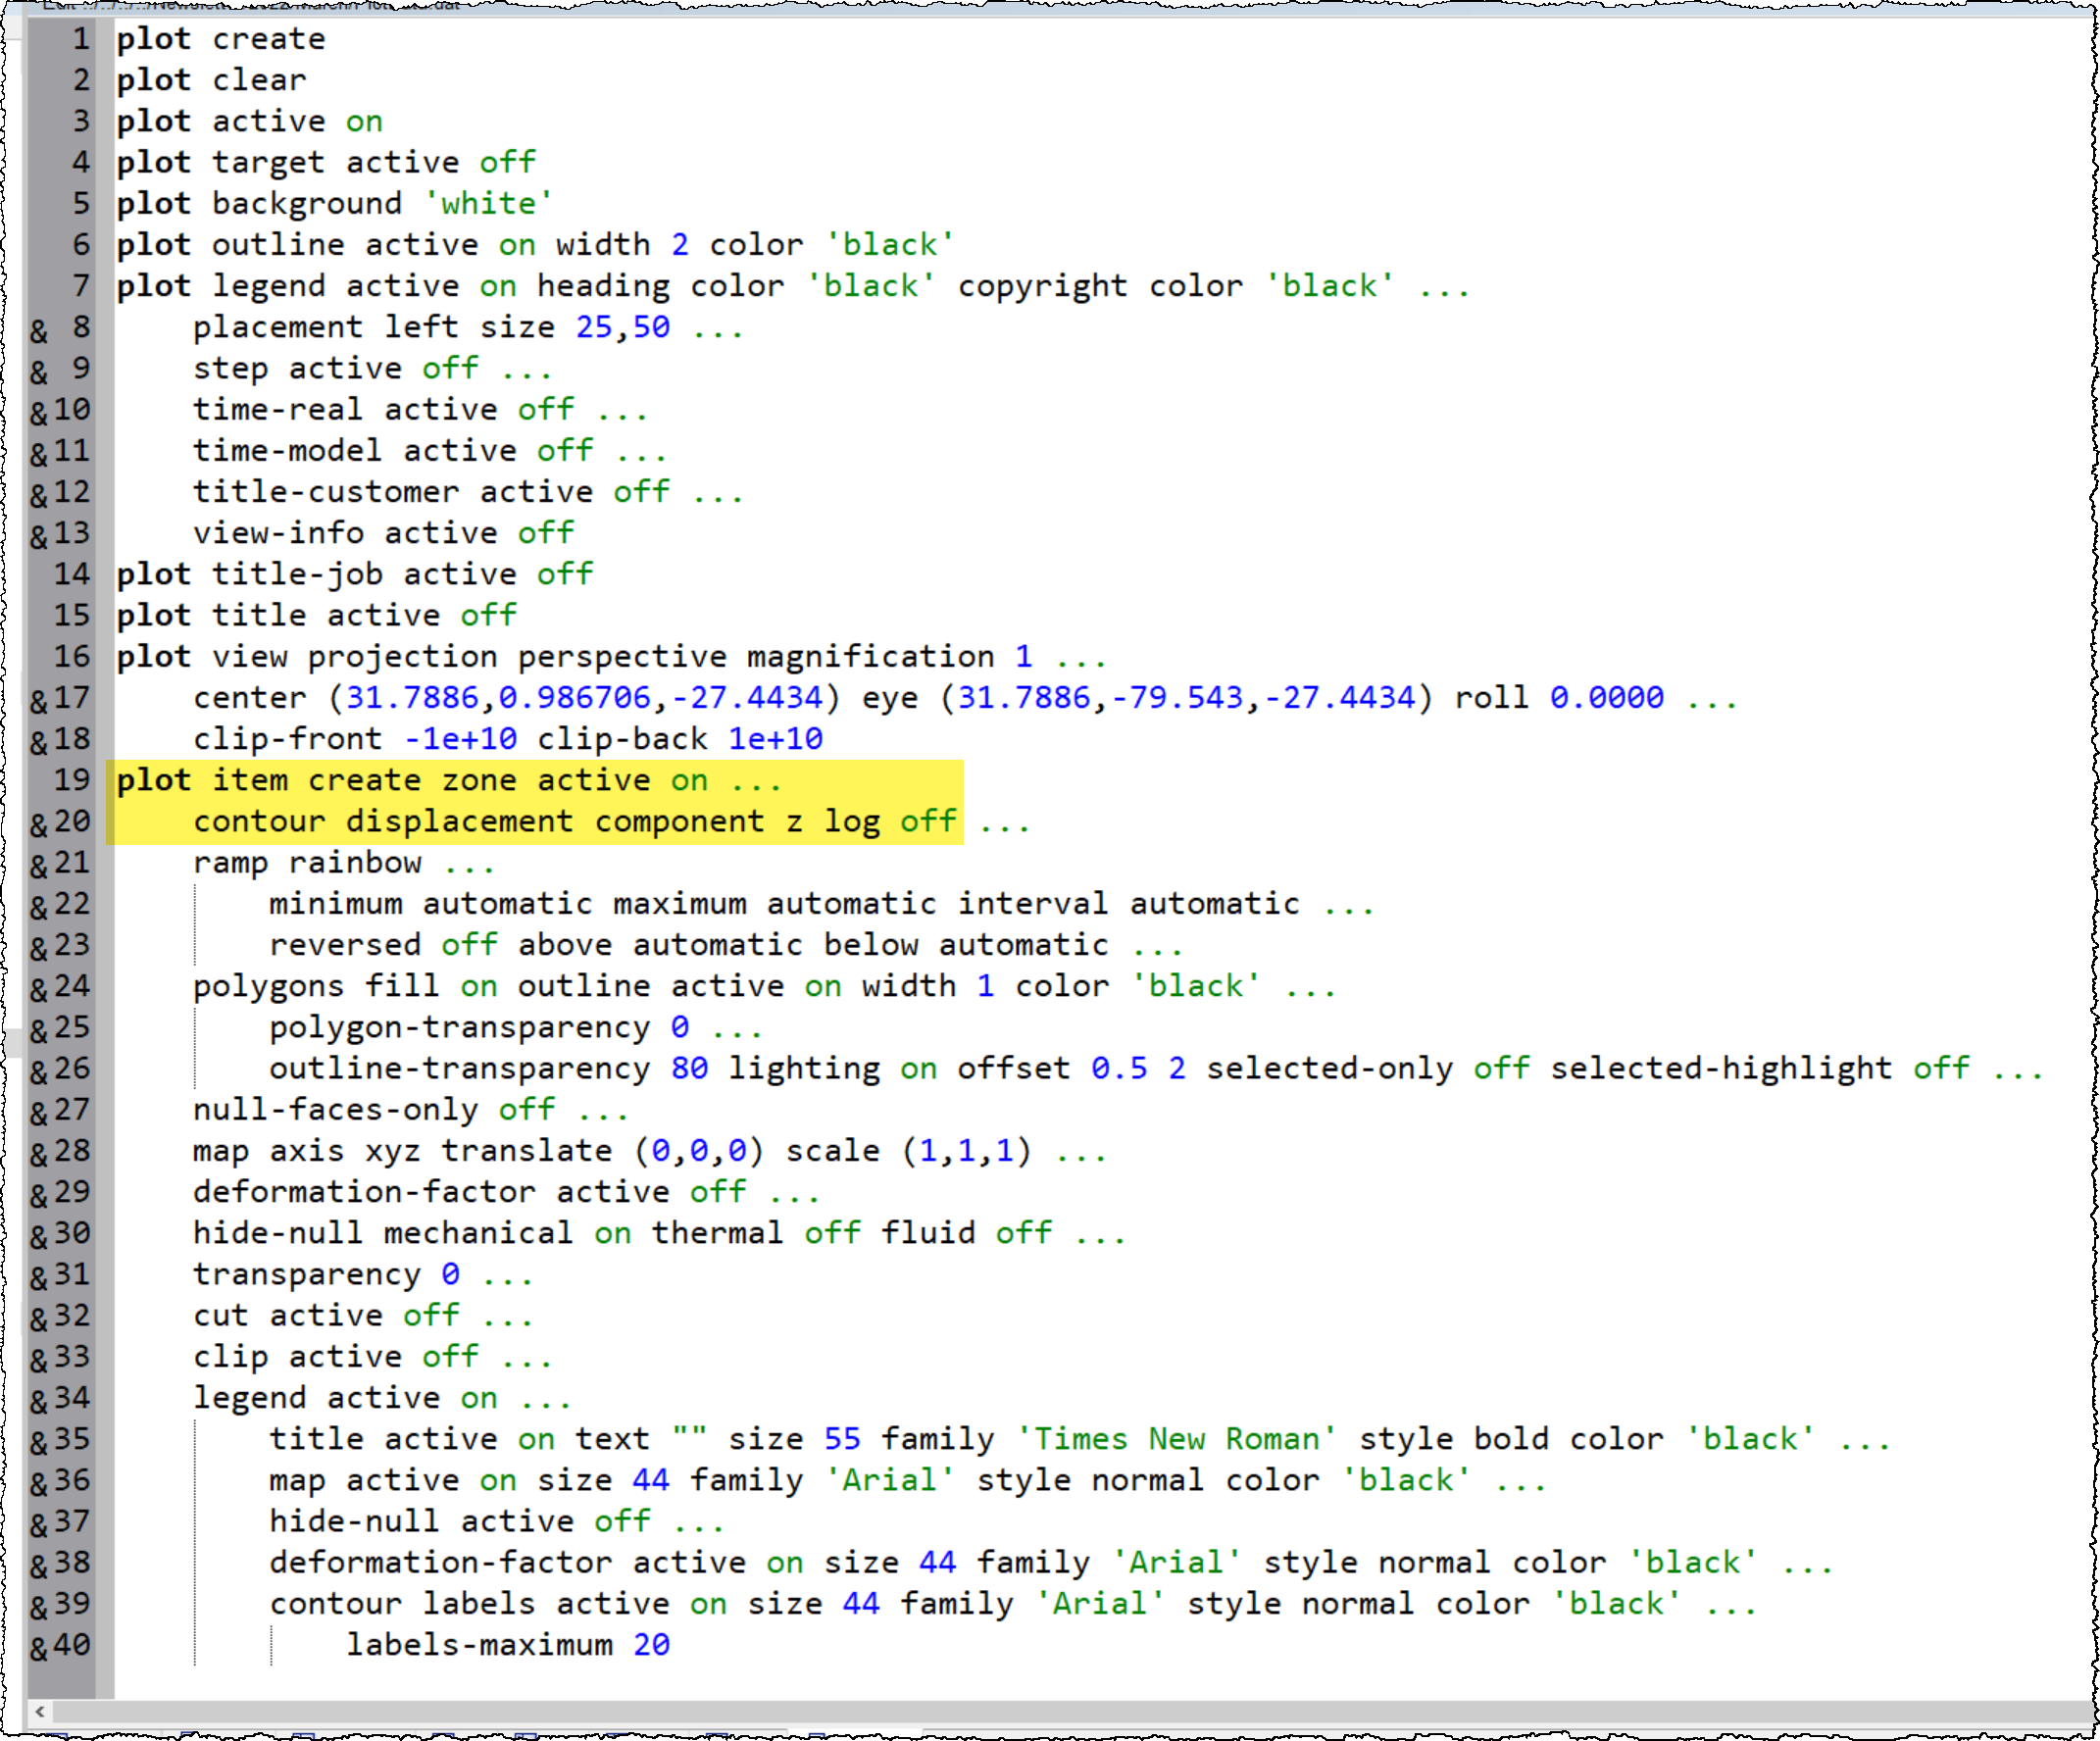
Use of indentation for the switches facilitates identification of the plot’s command structure. As can be seen when reviewing the exported plot data file (above), there are an extensive number of switches that govern the appearance of plot items. Fortunately, it is likely that only a few plot item switches will be pertinent to your goals in manipulating the plot (providing you don't need to replicate the plot in its entirety). For example, the plot data file above consists of 40 lines of code, but the main command (lines 19 and 20, highlighted) for an existing plot is essentially:
plot item create zone active on contour displacement component z log off
If the default settings are sufficient, this could be further simplified to:
<strong>plot item create zone contour displacement component z</strong>
Of course, the closer you need to reproduce the plot, the more information you need to include. From the plot data file, we also see that the command plot create (line 1) is the command to generate a new plot. Note that if a name (e.g., plot create 'cool-plot') is not specified, as in this example, a default plot name is assigned.
If the plotting sequence is one where changes must occur (for instance, as part of a movie where the model view shifts, magnification changes, colors change, etc.), it is recommended that the desired change be made interactively, followed by export of a second data file. By comparing the exported data files, one can relatively easily identify the keywords and values associated with the modification made to the plot.
Replicating Plots
Don't forget that you can also easily copy a plot view to create a duplicate (refer to the command or UI). This is useful as a working copy that you can modify without ruining the original plot or to use as a new base you can modify as needed.
Also, in the case where you want to reuse the plot exactly, it is recommended that you save the plot to a plot file, which effectively provides a plot template that can be opened into any project to display the exact same plot (plot-items, settings, and view).
